Every year when Palm Sunday comes around, we’re faced with a dilemma when we get home: What do I do with my palms now? Often, we’re tempted to just throw them out. But the palms are blessed by the Church and deserve to be respected as such. Blessed items can be properly disposed of by burning or burying them, and some parishes will invite parishioners to bring in the previous year’s blessed palms, which they then burn to make ashes for Ash Wednesday. If, instead, you’d like to keep your palm and make it look more decorative, you can follow these simple steps for folding it into a cross:
1.
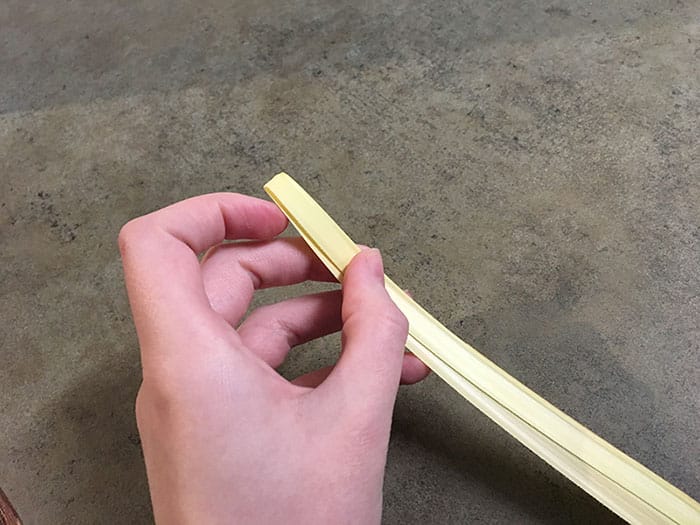
Hold your palm vertically, and fold it directly in half, so that the thin point extends just slightly past the wider end.
2.
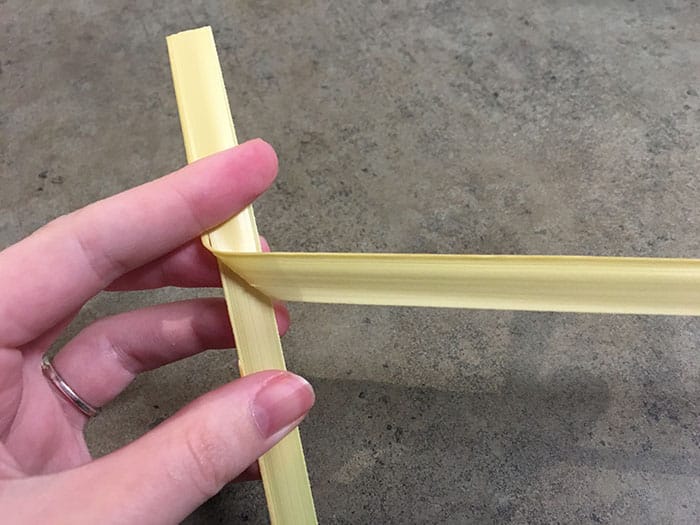
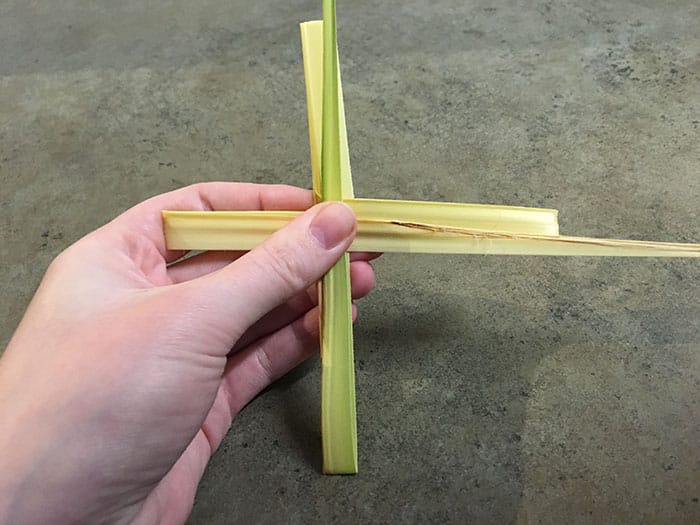
Turn your palm over so that the thinner side is hidden under the wider side. Lift the wide piece, and bend it to the right, about a third of the way from the top. (the point of your first bend)
3.
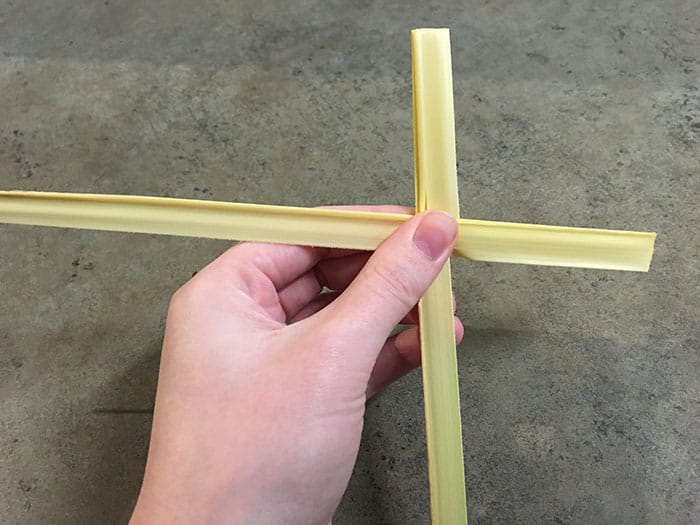
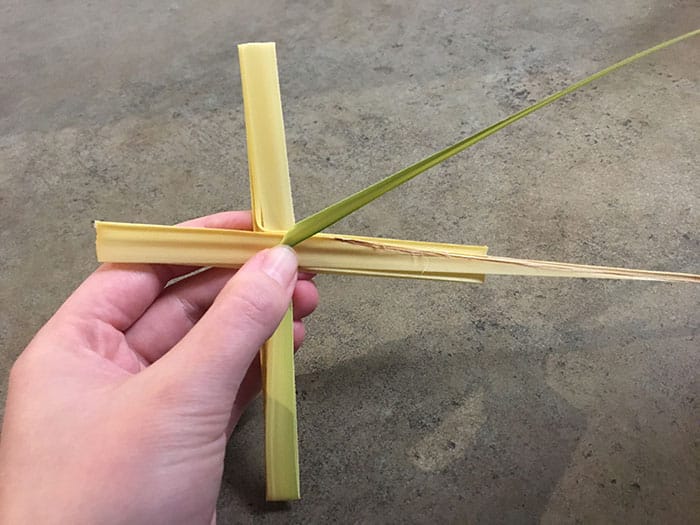
Using your thumb and pointer finger, measure the length of the top of your cross. (the area between your top fold and your fold to the right) Use this to measure the same length onto the wide end that is currently facing right. Bend this end to the left at the point you measured, over the side facing away from you.
4.
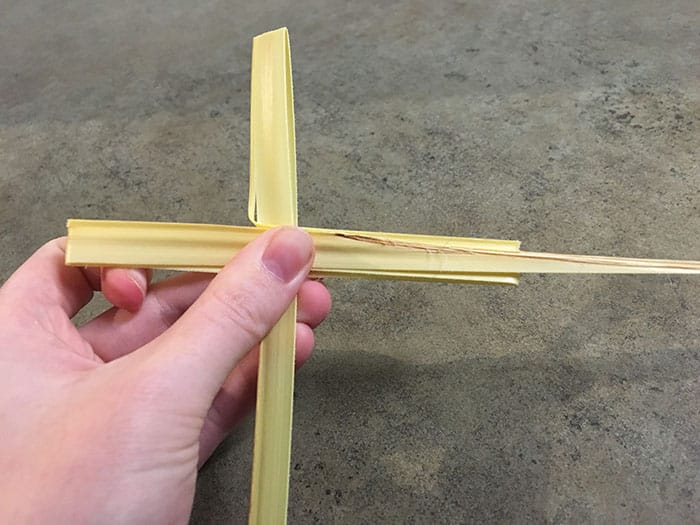
Use the same technique to measure the length of the left side of your cross and bend at the measured point towards the right, over the side facing you.
5.
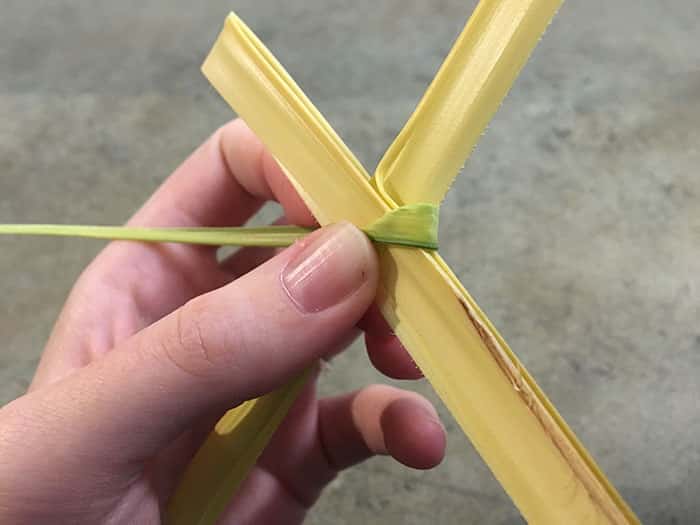
Fold the bottom, thin side using the same technique, also over the side facing you. The thin tip should extend past the top of your cross.
6.
Crease the thin tip at an angle, so that it points up between the top and right ends of your cross.
7.
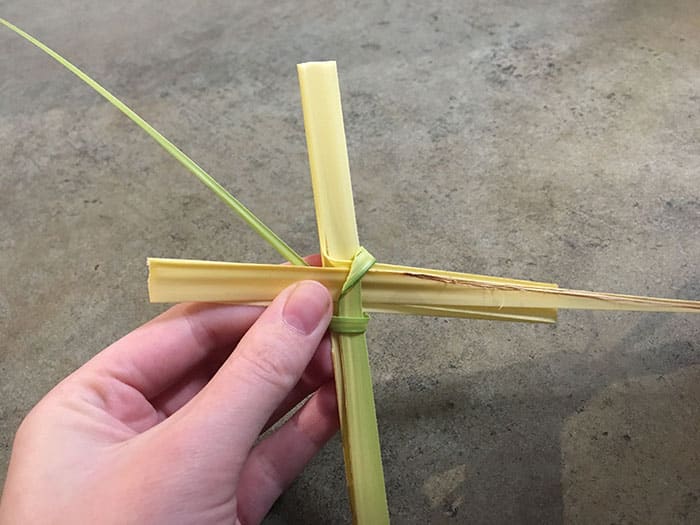
Carefully fold the tip back, around the cross and over the side facing away from you, so that it points down between the left and bottom points of your cross.
8.

Bend the tip so that is lays straight across the top of the bottom portion of the cross.
9.
Fold the tip over the side facing away from you between the bottom and right end of the cross at an angle, so that it points up between the top and left end of the cross.
10.
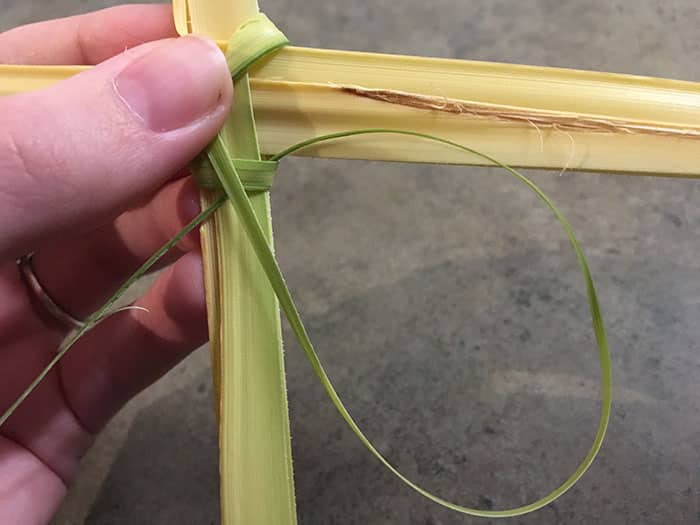
Fold the tip at an angle, back over the side facing you, so it points down between the right and bottom ends of the cross. Curve the end of the tip back, holding it down at the bend so it doesn’t lose its shape. Push it into the space between the bottom end of the cross and the folded palm that lays straight across, creating a loop.
11.
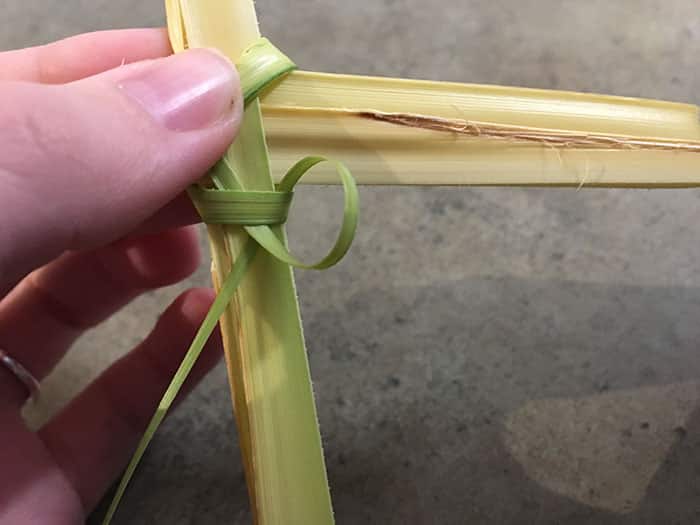
Gently pull the tip of the thin end until it is taught.
12.
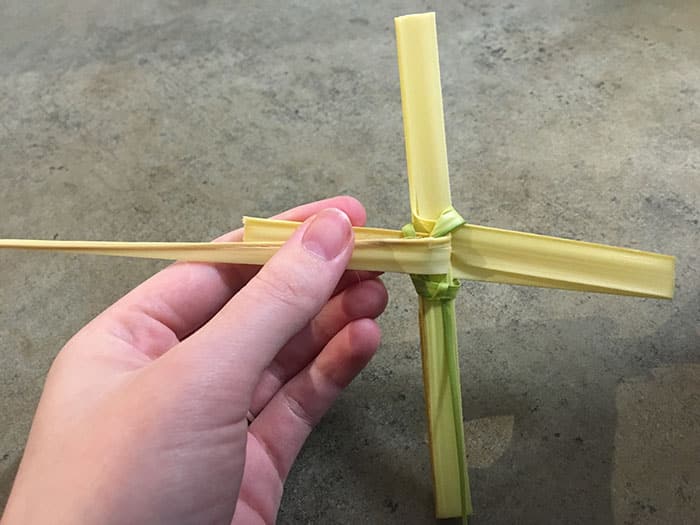
Fold the remaining portion of the thick end over to the left side, creasing at the center of the cross.
13.
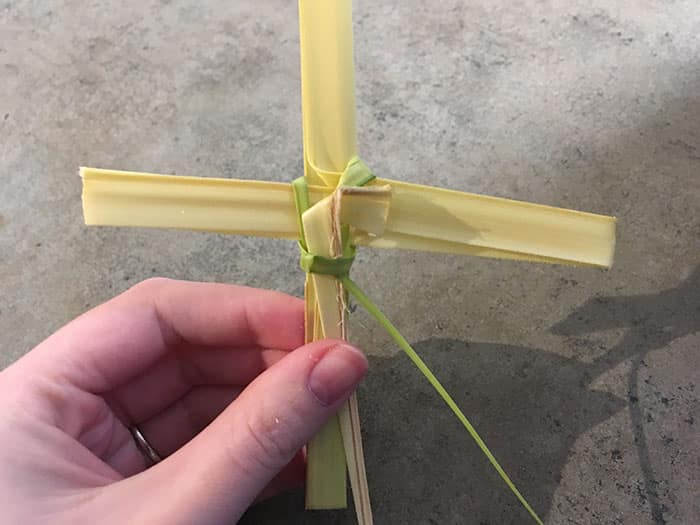
Bend the thick end back at the center, at an angle, so it faces downwards. Tuck this end between the bottom of the palm and the piece that lays horizontally flat, alongside the thin tip.
14.
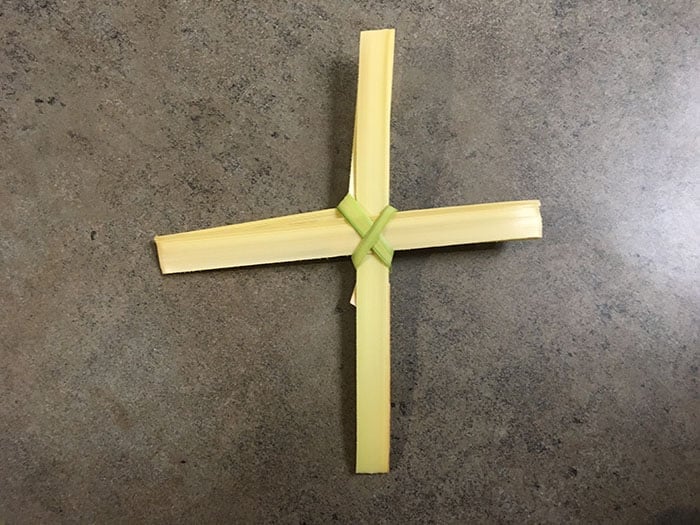
Trim any pieces that continue to stick out from the ends of your cross, and turn it over.
You have a fully folded palm-leaf cross.